What makes a gallery wall practical or purposeful?
Create dual purpose. While décor serves an aesthetic function, it can also be practical. You can declutter some table spaces, and move items to your wall. You can incorporate a clock into the design. You can pretty up a calendar to add to the wall.
What will you need to make a gallery wall?
While I like to send you tidbits on what and where I buy my products, do know that if you click an affiliate link on this page and make a purchase, I may earn a small commission at no additional cost to you. See my disclosure policy here.]
- Paper (construction, tissue, wrapping, etc)
- Blue tape or painter’s tape
- Drill/Screws
- Hammer/Nails
- Measuring tape or ruler or yard stick
- stool or ladder
- pen or pencil
- level
- command strips (optional, but great for keeping a picture frame level.)
- Items for the wall:
- knickknacks
- clock
- calendar
- picture frames
- artwork
- metallic letter signs
- etc.
How do you plan out and create a gallery wall?

Step One:
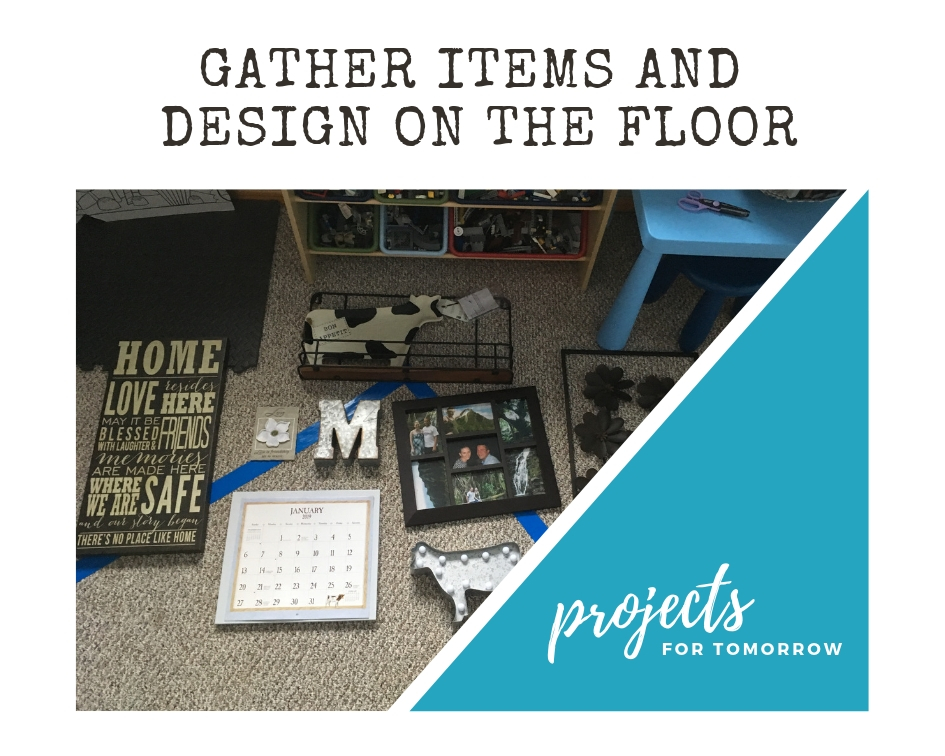
Gather your collection of items. Lay them on the floor in a cohesive way.

- Find items that can be aesthetically pleasing but also serve a dual purpose. i.e. clock, calendar. etc.
- Start with the large pieces and add more items to each side.
- Look for items of similar shapes and add them on opposite sides of your larger item.
- Look for items of similar material and separate them as well.
Step Two:
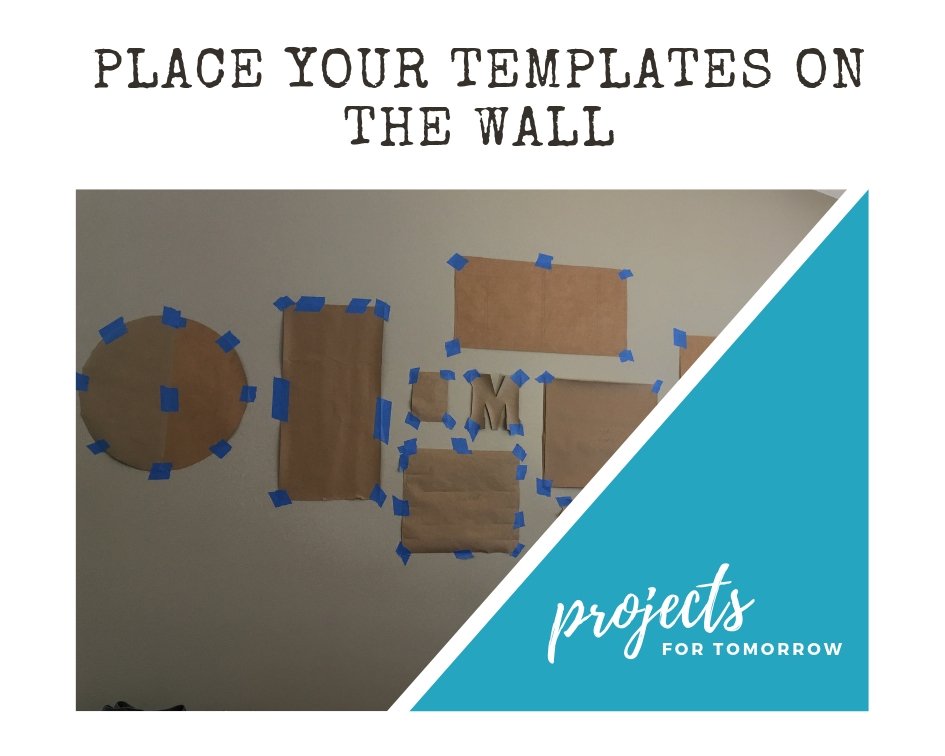
Design on the wall.

- Lay your paper flat on the table and trace an outline of your item.
- Cut out each item in the paper and tape it to the wall with blue tape.
- Start at the middle and work your way out.
- Move the paper around the wall until you have found your ideal composition.
Alternatively, if your gallery wall is small enough, you can use wrapping paper like Casey does at thediyplaybook.com. To further explain, you can lay out the wrapping paper and trace your items and then put the entire piece of paper on the wall. No cutting needed.
Step Three:
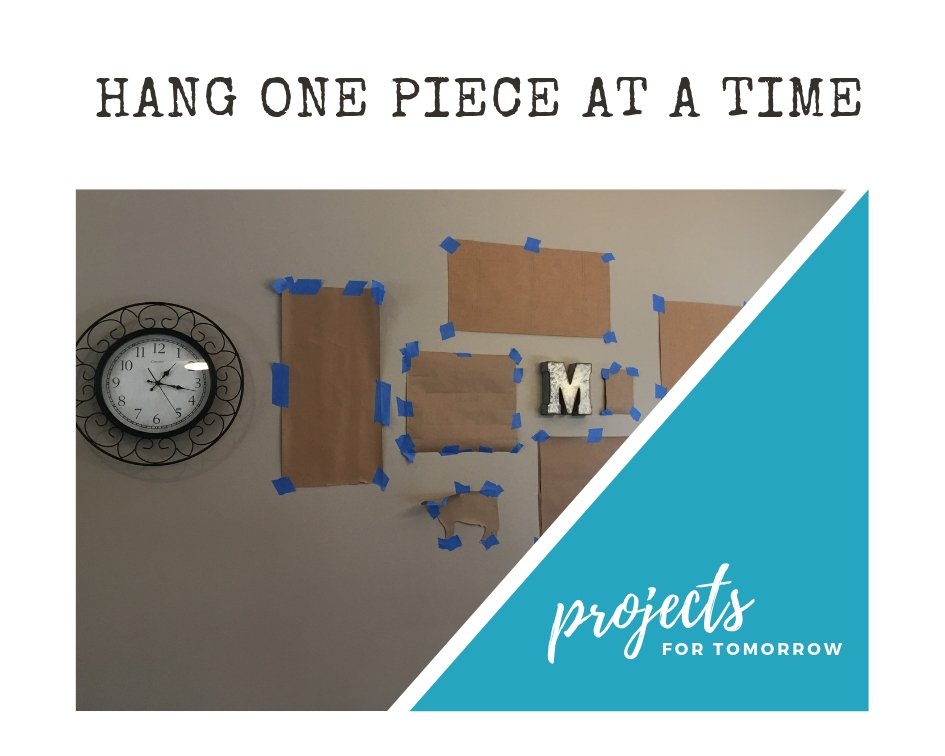
Hang your items with your necessary hardware.
- Hardest part of the project will be putting those nails and screws into the right places.
- Tips and Tricks:
- When you trace the outline of your item, also leave a pencil mark for where the hole needs to be drilled right onto the paper.
- You can also try hanging up your item with the screw in it and make an impression in the paper with the screw.
- Another way I have seen is to measure the back of the item. For example, the drill hole was 2 inches from the top of the item, so make a pencil mark 2 inches from the top of the paper.
- Once the screw or nail is in place, you can then take the paper off the wall.
- Continue until every item is on the wall. I started with the clock, as it was annoying to stare at the wall and see no clock. (you know what I mean!?) Then, I started in the middle and worked out.

Step Four:
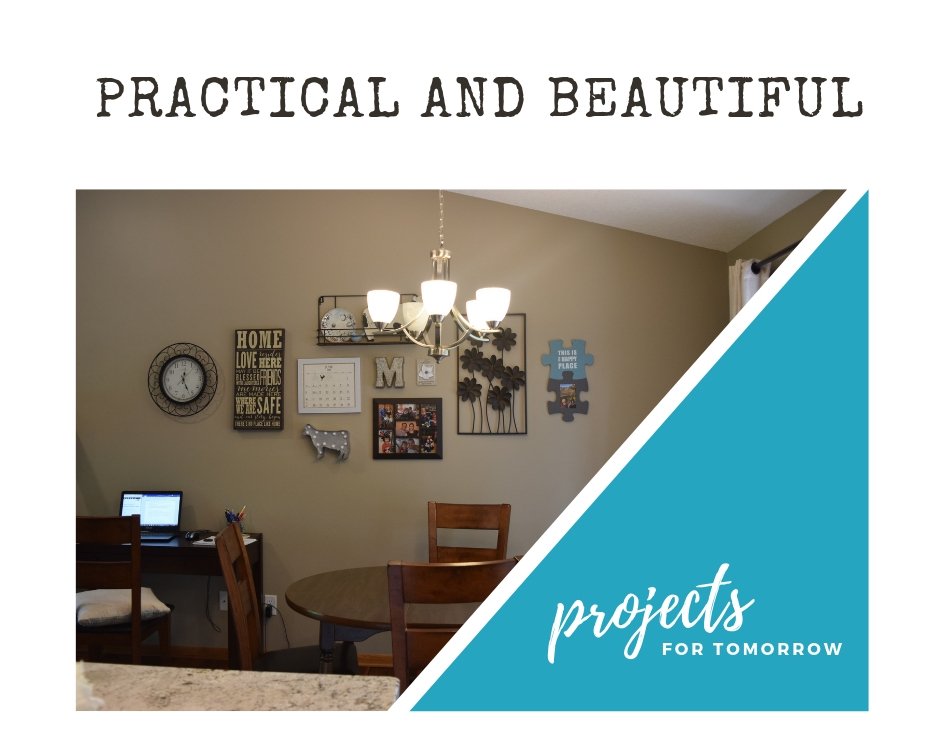
Enjoy your beautiful gallery wall.

Gallery Wall Design tips and tricks
Spacing: you want consistent spacing through out your design; i.e. 2 inches of space on one side, 2 inches of space on the other.
Consistent Material: find two or three items of the same material. For example, my clock is made of a dark metal, so I found another piece of artwork that was also a dark metal. The same was done for my soft gray metal pieces. These items should be spread out in your composition.
Depth: How far out does the material stick off the wall? Will it get bumped by bystanders?
Color: Will the colors match your current space? Do you have any clashing colors among your pieces? You may need to leave a piece out.
Overall Look: Take a step back and examine your design. Examine all angles. Still not confident, take a picture of your design. Move a few items around, and take another picture. Use your best judgement in comparing photos.
How do I find the right spot for my gallery wall?
If you have a wide open wall, you can start your gallery around 57 inches off the floor. However, if you have vaulted ceilings as I do, you can start higher. If you have a couch at the bottom of your wall, you will want to start your gallery 5-8 inches above that. Of course, there are exceptions to these rules and it’s your wall. Do whatever looks best to you.
Conclusion
Creating a gallery wall can be practical and make your room look beautiful. It might be the exact thing you need to complete your space.
Can you think of any ways to make your wall more practical?
Helping you plan for tomorrow,
~H.
Looking for more design tips, check out my kids’ playroom ideas here.
Are you thinking about renovating your kitchen space, you may be interested in reading this.


