Every homeowner that owns a shed knows the value that it provides. But there are a lucky few of us that own a wooden shed.
Wooden sheds, however glorious in their storage capabilities, need to be maintained and can create problems if they don’t receive some TLC (tender loving care).
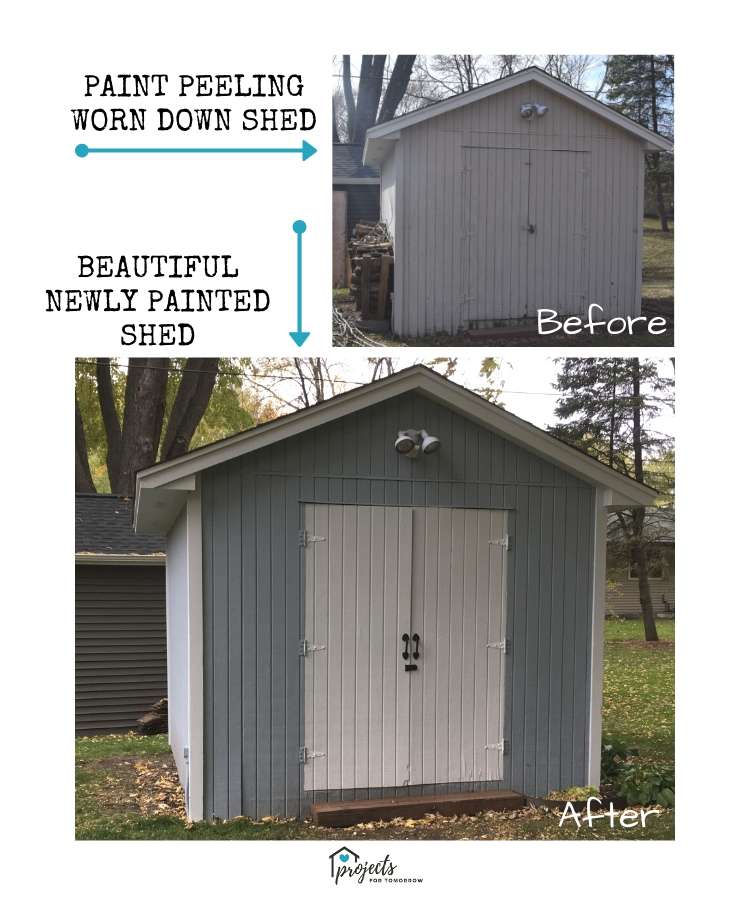
While having a paint peeling eyesore in your backyard is one problem, the biggest concern a homeowner may have is rotting wood. Unfinished wood will deteriorate from the elements if it is not protected with stain or paint.
You could take the easy but more costly approach to protecting your shed and install easily maintainable vinyl siding, but that’s not what I did.
For a fraction of the price, you can paint your shed the frugal way: you can strip the loose paint, prime it and paint it.

While tedious and time-consuming, painting a shed is not a difficult task and I think many homeowners can DIY this home project.
Today, I’m going to cover all of the steps in restoring my paint-peeling shed so you can have the confidence to do it too!
Learning how to paint a shed has never been easier. You’ll learn how to:
- plan for your project
- prepare your wooden shed for paint
- prime your wooden shed
- paint your wooden shed
I’ll include all my best tips and tricks along the way.
Planning for your Home Project
Once you’ve decided that painting your shed needs to happen, your first steps should be researching your paint colors and your how to’s. Decide how big this project will be and whether you have the time to do it.
My first step is driving to my local hardware store, Home Depot and grabbing a few paint swatches of interesting colors. I’m looking for two tones of color that will work together for the base color and the trim.
Next, you’ll find me on Pinterest, searching for other sheds in similar colors, and “how to’s”. Pinterest is a great place to find inspiration and helpful tips. You can follow my research journey here.
I then narrow down my color choices and start answering the following questions.
Do I have all the necessary tools to paint a shed?
Because I’m an avid painter, I don’t need to buy many tools, but usually I need to buy roller trays. Estimate your square footage so you can figure out how much paint to buy.
In addition, will I be rolling on my paint or renting a paint sprayer?
Renting a paint sprayer may require you to purchase more paint as some of the paint doesn’t make it onto the surface. You also need to figure out where to rent your sprayer and the logistics of when and how you are going to get it. I prefer using rollers.
When am I going to work on this project? What weekends are available and how does the weather look?
Having enough time to tackle this home project is surely important. It will take hours upon hours to strip the loose paint. And even more hours to paint on primer. And even more hours to paint on your base color.
Additionally, you may want to schedule around the hot sun. Plan on working in the morning and the evening. Or maybe on the shaded side during the afternoon.
Check your paint information to see if you can paint onto a wet or damp shed wall.
What does the shed look like? Are there any damages that need to be fixed prior to painting it?
Maybe it needs a few more nails to hold it down or you find a board has already rotted and needs to be replaced.
How big is the shed? Will it require a large ladder to reach? Do you need additional helpers?
Home projects are different for everyone. Be sure you think about what makes your situation different from others. Take that extra second to think through your circumstances and your needs.
For example, I had to use an extension ladder for the back side of my shed as the yard slopes down. For safety purposes, I made sure someone was always around in case, God forbid, I fell off!
Preparing your Wood Shed for Paint
While I like to send you tidbits on what and where I buy my products, do know that if you click an affiliate link on this page and make a purchase, I may earn a small commission at no additional cost to you. See my disclosure policy here.]
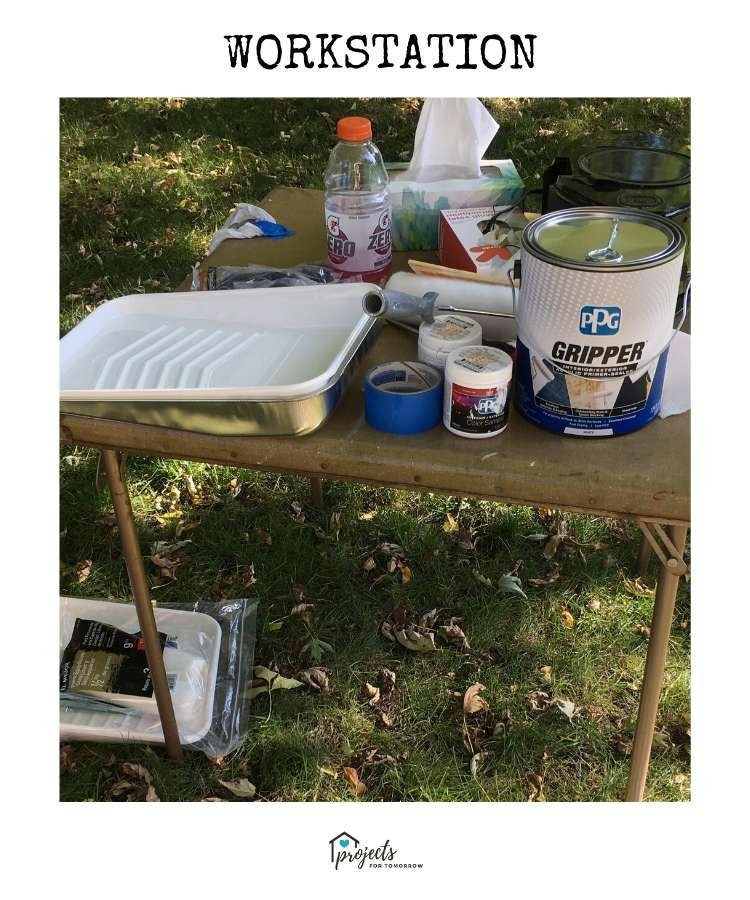
Workstation
At the beginning of my project day, I build myself a workstation. I have a very old card table I use for all my outdoor projects. I set it up in a convenient spot and then gather all my necessary items for the day. As a result, everything is close by and not on the ground.
Here are some of the items you will find in my workstation:
- A garbage bag taped open to the side of the table.
- A drink such as water or Gatorade.
- Plastic latex gloves
- Tarp or plastic painting sheathing (for ground cover)
- Paper Towels (for paint mistakes and could also be used for covering the ground)
- Blue tape
- Kleenex tissue (because I had a bad cold)
- Tools needed for that day (i.e. scraper, ladders, power washer, sander)
Prepare the Location
Another thing you will want to do day-of or day-before is to move everything away from the shed. For me this meant using my trusty (and rusty) wheelbarrow and transferring our wood pile somewhere else.
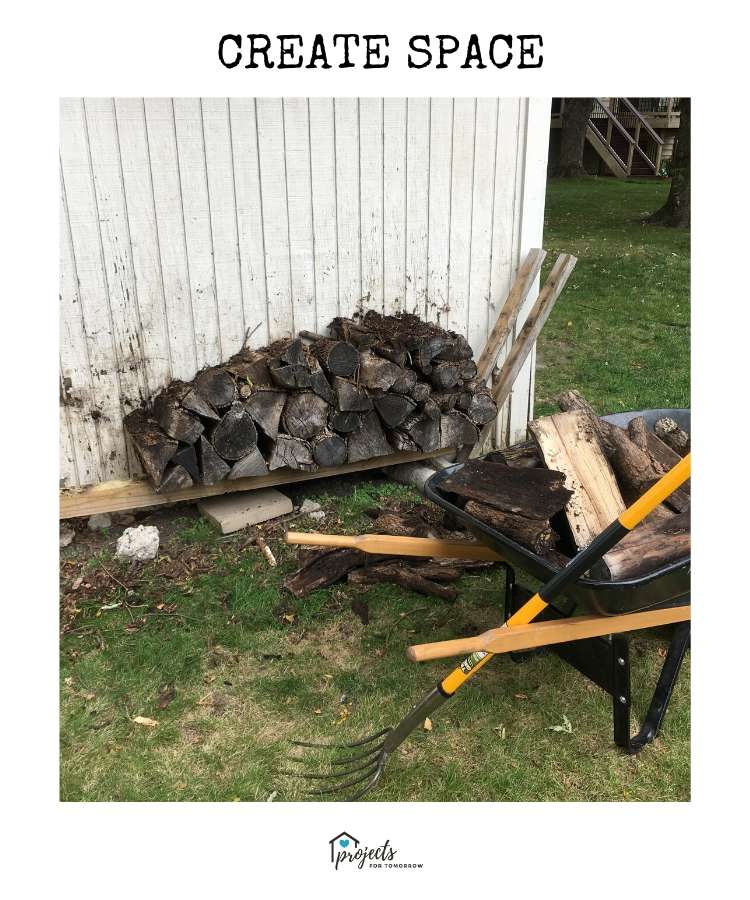
Maybe for you it’s lawn furniture, extra wood scraps, dog cages, etc. Just make sure you have enough space to work in. Because the next few steps will get very dirty.
Power Wash
Paint needs to adhere to a clean surface; therefore, your next step will be cleaning the shed of dirt and dead bugs.
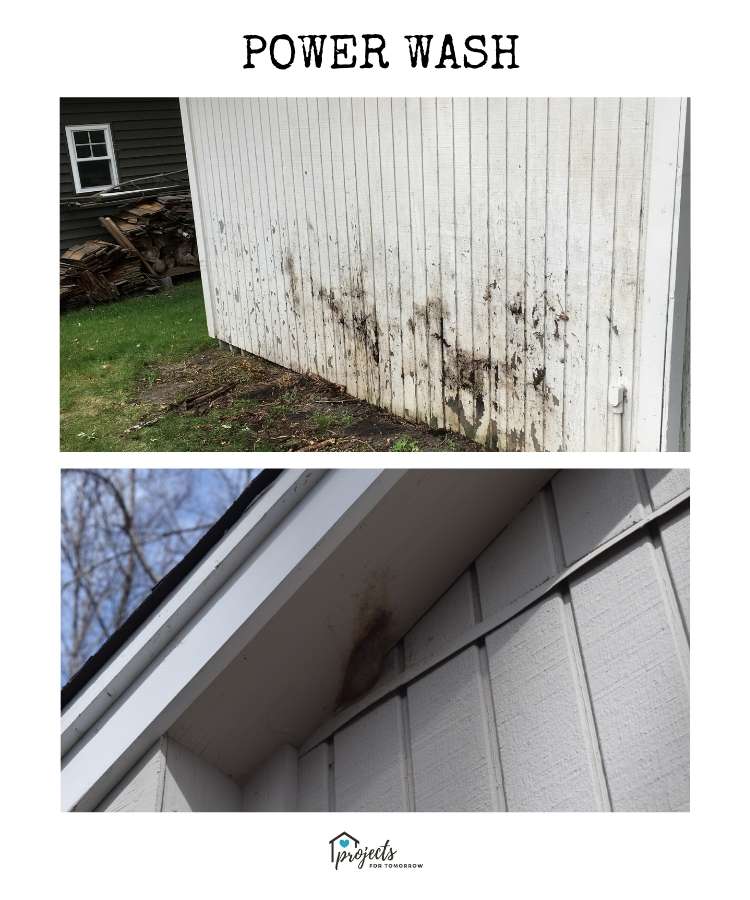
And maybe a mysterious nest…
I would suggest a power washer versus scrubbing by hand. It’s amazing the years of dirt that wash off with the right amount of pressure. You can use soap, but I don’t.
And don’t apply too much pressure because as a result you could put a good-sized hole in your wood.
Stripping the Paint
While power washing does help strip some of the paint off, the next step is to scrape the loose paint off the shed walls. This is tedious and will take the longest of your preparation efforts. But it is the most important! If you leave loose paint, it will just make the new paint peel off that much faster.
There are multiple ways in which you can strip paint off of wood.
- One way is that you could buy a paint stripper, let the liquid sit on the wood for an extended period of time and then wash or scrape it off. I’ve used this one in the past.
- Two, you can power wash it off with the right amount of pressure and a patient hand.
- Or three, you can buy a lightweight scraper and scrape it off.
Depending on the level of peeling paint, you can decide which method works best for you or you could try multiple methods.
For me, my shed was peeling a lot so I just took a scraper to each and every surface and scraped off anything that was loose and I didn’t worry about the paint that was still adhering.
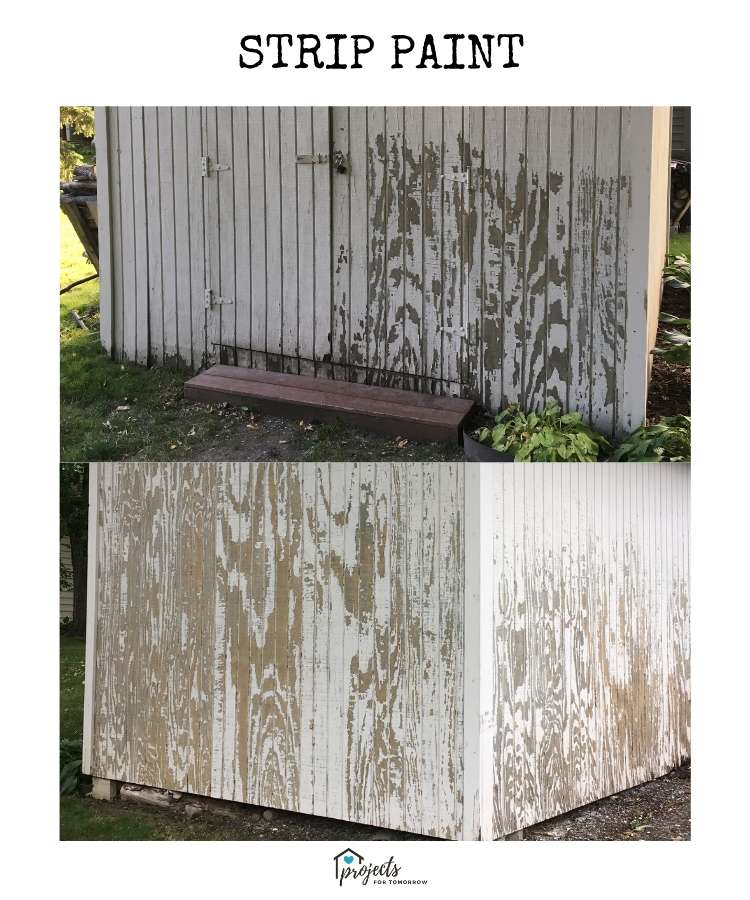
This being a backyard shed that I was re-painting, I did not worry about stripping all the paint off. If you were thinking about staining your wood shed, you would need to strip it all off.
Sanding the Wood
Sanding the wood will help adhere the primer to it. (It might also help strip some of that pesky loose paint off too!) Be sure to sand up and down with the wood grain. You can sand by hand or use a powered belt sander.
Power Wash Again
Give your shed a good cleaning again as it may have rained since you last washed it (and got muddy). You also want to be sure all the sanding dust is off.
Paint a Sample
Once you have an idea on color, I would suggest getting a small paint sample to test out in your yard. Check the color at different points of the day as the sunlight changes and affects the overall color.
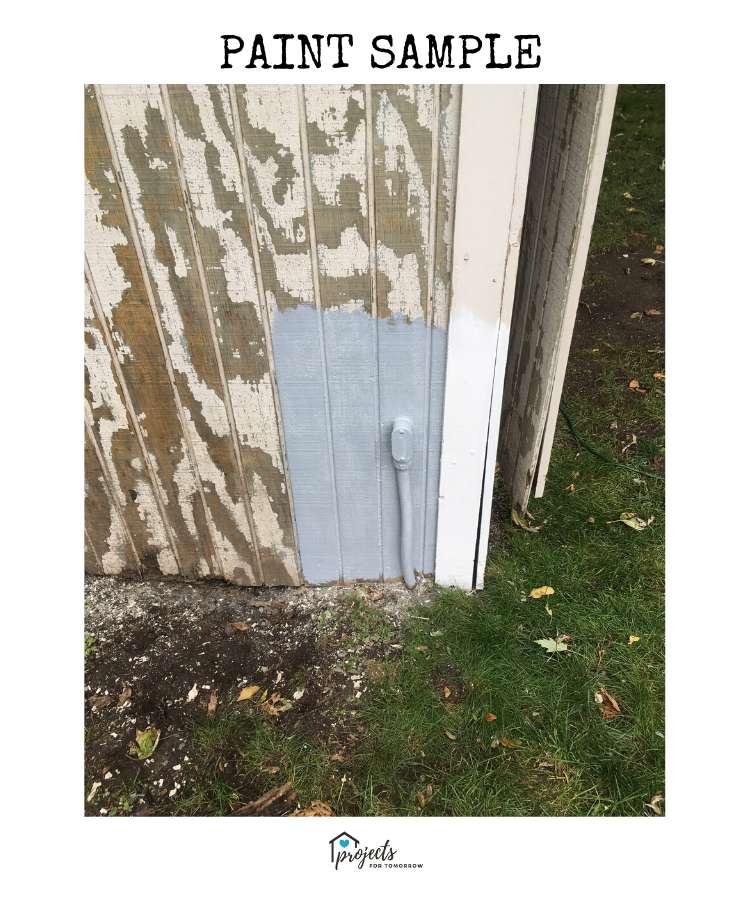
I tested in the side bottom corner with my top two-tone color choice.
Priming the Wood of your Shed
Again, your first step on painting day should be creating your workstation. This time it should include everything from before and then all of your painting supplies.
- Primer
- Can opener
- Stirring stick
- Roller tray
- Roller with new sponge
- Paint brush
- Handy painting pail
- Ziploc baggies to protect your brushes during breaks
Use the primer to paint a light coat on your wooden shed. Start at the top and work down. Paint everything, the trim, under the overhang, the vents, everything.

I started with a paint brush back and forth brushing the trim. And then used a roller on all the larger sections. The paint brush was easily used to get corners, edges, and the vertical creases. Then the roller was used to paint on primer more rapidly. I did one side of the shed at a time.
Painting the Wood Shed with your Base Color
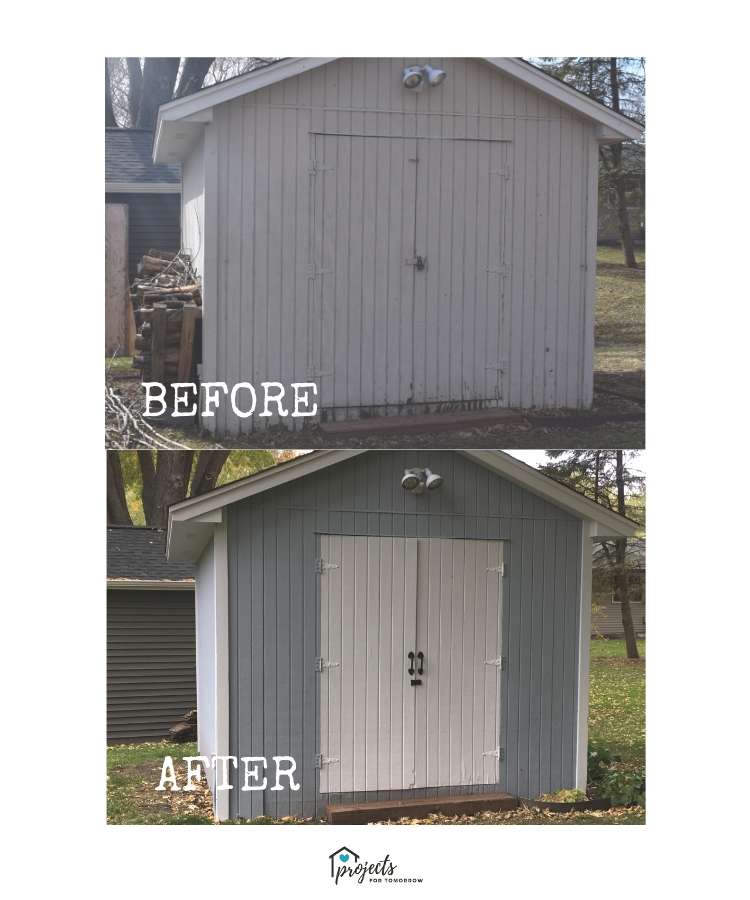
Once the primer has dried, you are ready for the exciting part: your base color. Again, start at the top and work down. My bluish base color would be painted on all but the trim and doors.
Using the paint brush, slowly paint on a liberal amount of paint around the edges. The trim will be painted later so you don’t have to be super perfect in your lines, but don’t go crazy either.
Once a small section (ie. 4ft by 6ft) is completed with the brush, set it down and use the roller to brush on paint to cover that whole section.
One small trick is to set your paint brush in your handy pail and put a gallon size Ziploc bag over it to prevent the brush and paint from drying out. At the end of the night, I will take the liner out of the handy pail and put it and the brush (if I don’t have time to wash it) into the bag and zip it closed.
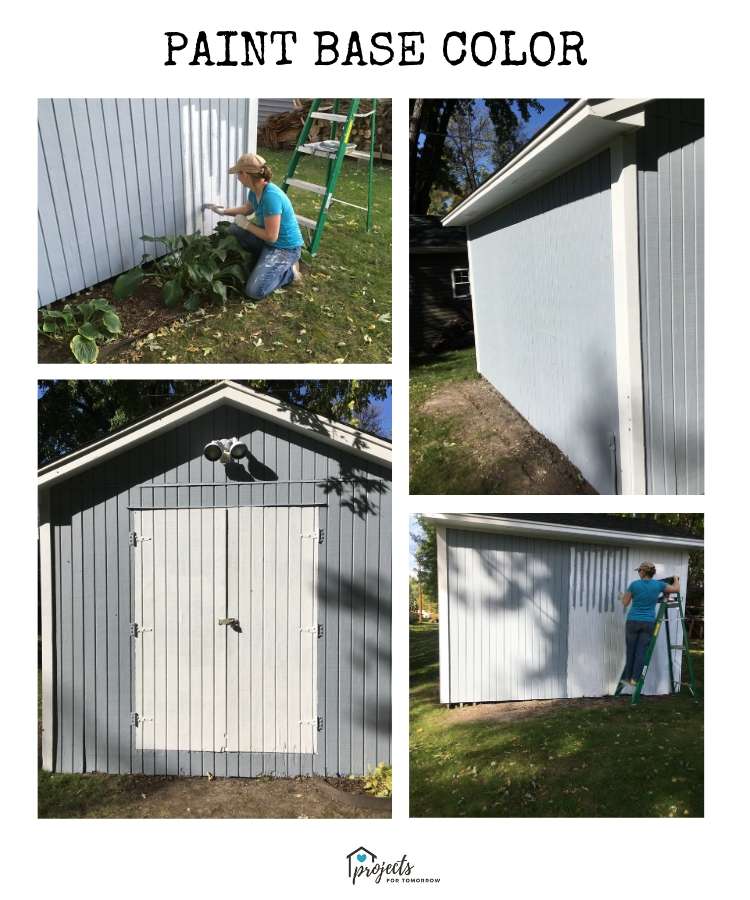
Painting the Wood Shed with your Trim Color
Once the base color has dried, you can make quick work of your trim.
My secondary color was a white with a hint of grey in it.
Again, start at the top and work down. If you work slow enough and at the right brush angle, you can paint without painter’s tape.
If you strongly feel you cannot do this, take an additional step and add painter’s tape to the edges that you don’t want painted. But, be sure your base color is dry.
Brush on the trim color with your paint brush and use the roller for the larger sections.

Painting the Doors and Hinges
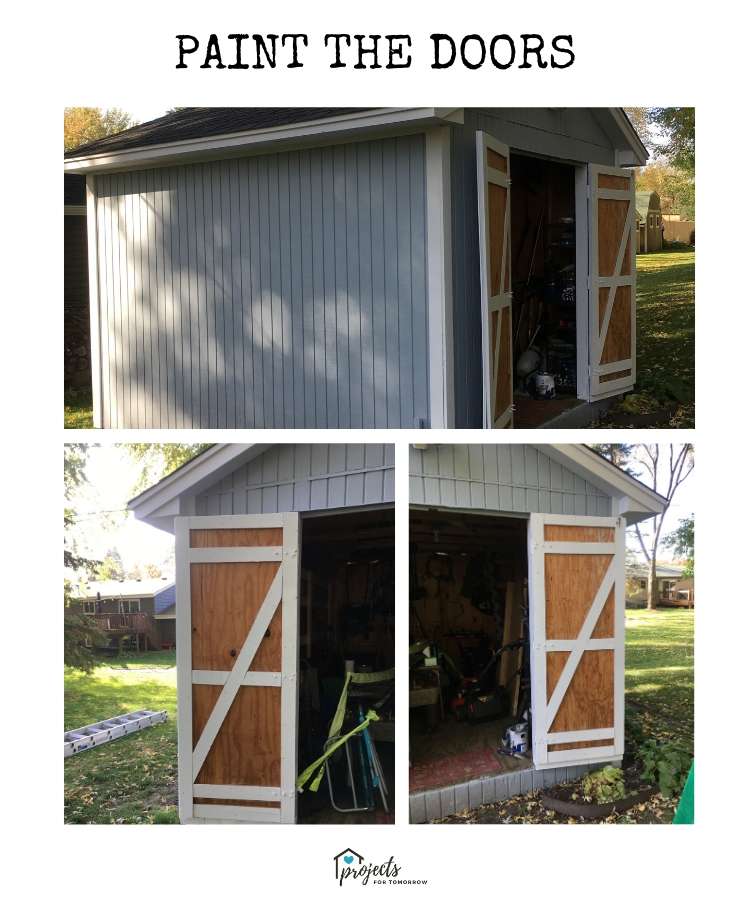
This step was done last because we normally keep our shed locked; I wanted to take off the hardware on the doors, re-paint and then put the new hardware on before nightfall.
The doors were painted in the white trim color. I painted over the door hinges as well but eventually painted them a dark color to match the new hardware.
Painting the Inside of Doors and Trim
If you find yourself having leftover paint, continue your brush strokes to the inside of your shed. The doors can be found open during the day, so it was important for me to paint them. The inside trim was looking pretty run down, so I took a few minutes to paint that too.
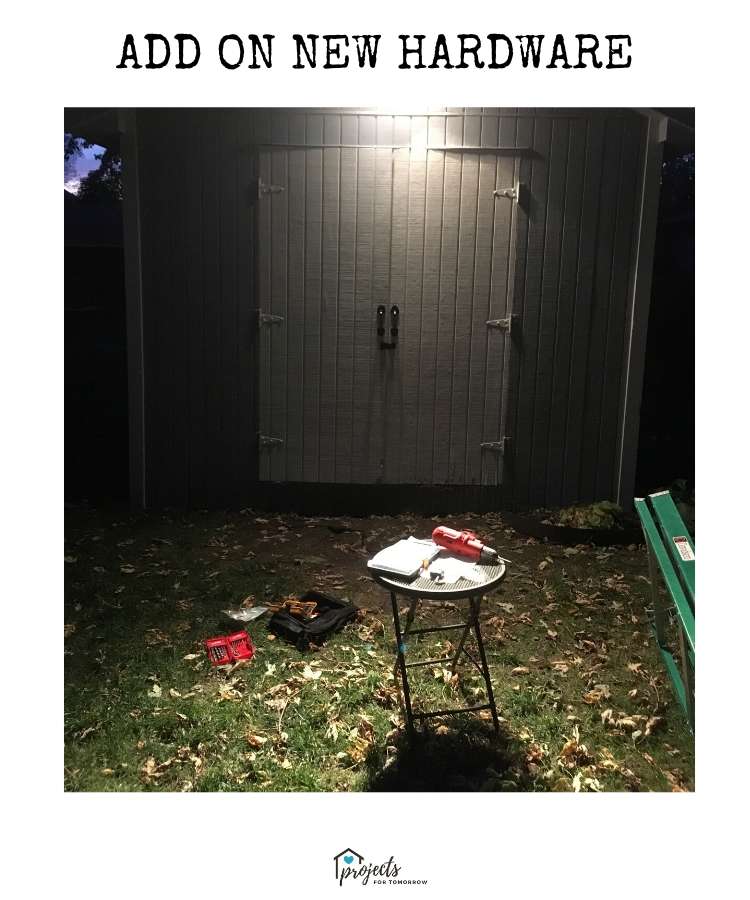
Adding the Hardware
Once the paint is dry for at least four hours, you can install your hardware onto the door. We did this step in the dark after the kids went to bed.
Clean up your Workspace
The last step is really cleaning up your space and putting all your tools away. After every night, I was able to lift my workstation table right into the shed. It was so efficient. But when your project is complete, you will want to put everything back to their rightful homes.
FAQ’s for Repainting your Shed
This tutorial really wouldn’t be complete without some tips and tricks of the home project. You can learn more painting tips in this post.
How often should you paint your shed?
Ideally, you want to paint your shed every 5 years; give it one protective coat to help it survive the elements. For us in the Midwest, that means protecting it from the rain and snow.
Why do I paint with a brush versus spraying it on?
While painting with a brush takes like three times as long to paint, I have many reasons why I use a brush. One, I don’t trust myself with the sprayer. LOL. Two, I’m pretty picky about paint drips and brushing ensures that no drips are left behind. And three, I don’t want to rent a paint sprayer; it’s one more step, and one more expense.
But if you are interested in learning more about using a paint sprayer on your shed, check out this post from Anika at Anika’s DIY Life.
How do you roll the bottom of your shed without the paint roller getting dirty?
Your shed may be touching the dirty ground and nothing says amateur than rolling dirt right into your painted wall. To get around this, I used a few sections of paper towels on the ground. For instance, when the roller got close to the ground, I painted the paper towel instead of the ground. And no dirt was harmed during my painting of this shed. Okay, maybe a little.
Why did I only do one coat of paint?
The weather was a bit undecided in late fall. One day it was a beautiful and warm and then next it was snowing. Painting the shed a second coat was not an option for me. I did go back in the spring and touch up areas that needed help.
Where did I find the shed step?
The shed step was made with 2×4’s and painted with left-over deck stain.
Conclusion
Painting the shed by hand, while time consuming, is THE best way to save money on this home project.
Maintenance and a little old-fashioned TLC is the key to making anything last. If you take care of your shed, it will take care of you. Just check out these shelves we installed in our shed. The value this storage brings to our home makes it all worth it!
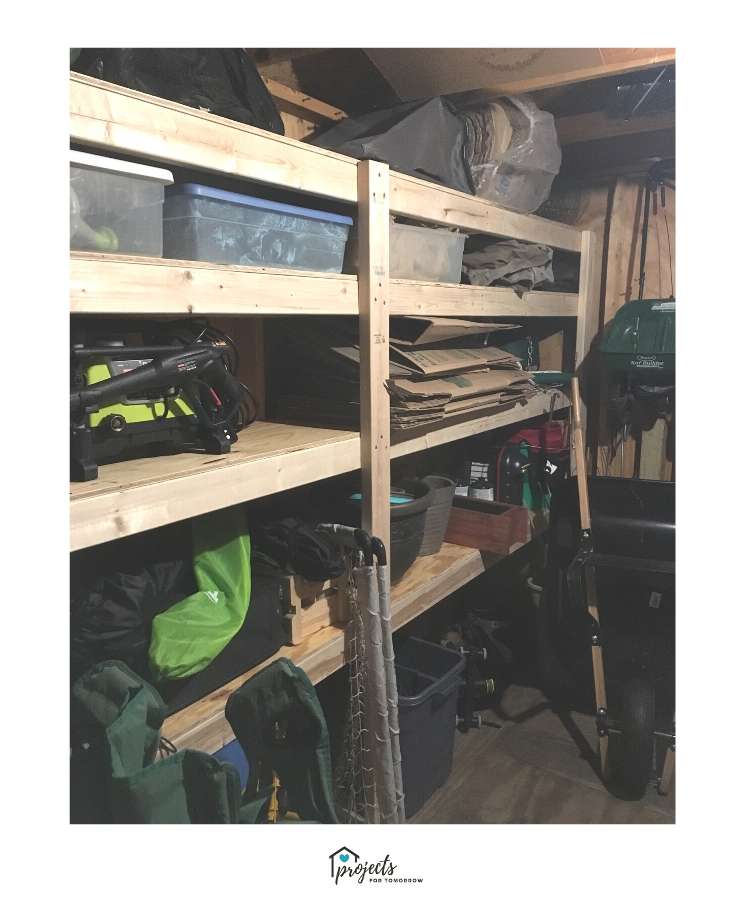
Going forward, if you paint every 4-5 years, you shouldn’t have much scraping to do. This will cut down on preparatory time and make this home project more manageable.
Overall, I’m very happy with the way the shed looks. It’s a subtle blue and doesn’t look out of place in nature. The before and after is incredible and I’m surprised I didn’t take care of this home project sooner.
What do you think will be your biggest challenge painting your shed?
Helping you plan for tomorrow,
~H
Are you tackling other outdoor projects this season? Because you may find these articles useful.
