Welcome to Kitchen Remodeling from the viewpoint of the homeowner!
When I first started researching kitchen remodeling on the internet, I was blasted with ideas; but I couldn’t find great first hand knowledge of what it’s like to go through the experience. So I documented everything as I went, and this website was designed so YOU can have that first hand insight into how to do this.
You will benefit from this site if you are thinking about remodeling your kitchen. I will go in depth about planning, organizing, and asking the right questions.
Want to see exactly what our kitchen remodel encompassed before diving into the details? Check out our scrapbook here.
Let’s begin with a summary of what kitchen remodeling is.
Kitchen Remodeling, by definition, is changing the form of your current kitchen by adding in new elements. It’s NOT renovating your cabinets to make them look better.
That’s not to say you cannot re-use elements of your current kitchen, which you can, like your plumbing and electrical hook-ups. (We even reused our sink faucet and all of our appliances.) But you ultimately are replacing your kitchen with something better, something more efficient, that is going to work for your family.
Kitchen remodeling is a huge undertaking. But with organization and due diligence, any homeowner should feel confident in remodeling a kitchen.
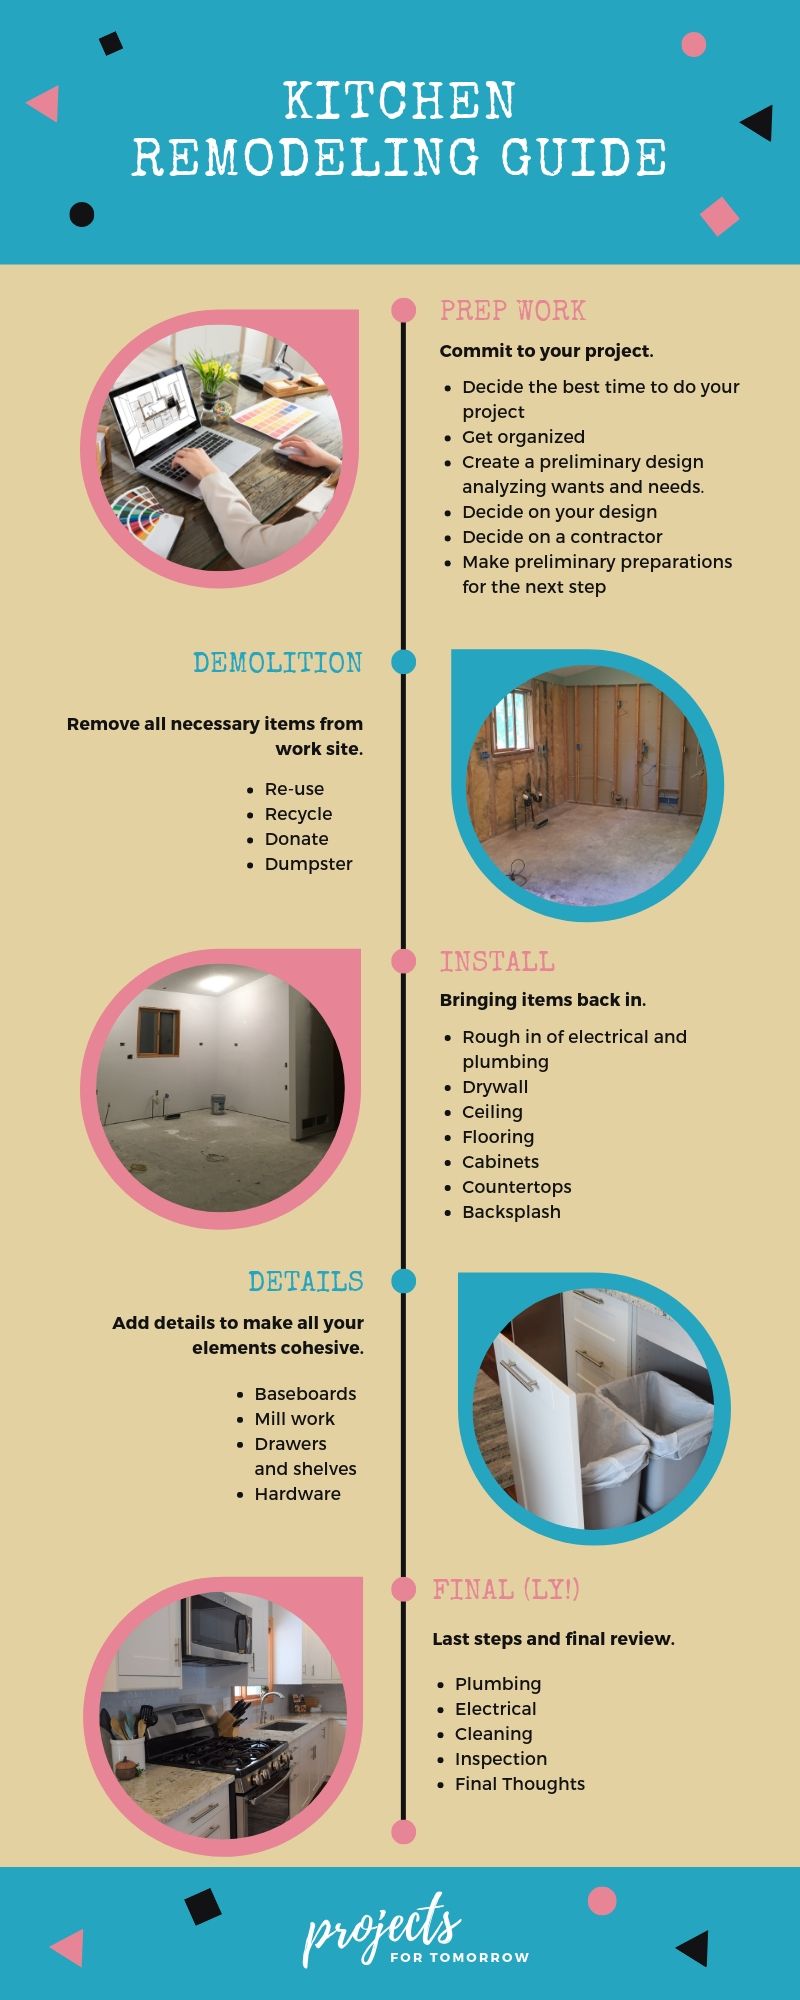
Let’s summarize the steps of the kitchen remodeling process:
Table of Contents
Click on each section to find the area of kitchen remodeling you are most interested in or scroll down to read through it all!
Committing to the Kitchen Remodel
The first step is committing to your kitchen remodeling project. First ask yourself why you are making changes.
Do you have storage space issues?
Do you have broken shelving and cupboards that cannot be fixed?
Why do you feel you can spend thousands of dollars to make this adjustment? Can you justify a kitchen remodel as money well spent?
Click here or on the image below to learn about the 10 reasons you need a new kitchen and learn the 10 reasons why you shouldn’t start your kitchen remodel.
When is the Kitchen Remodel going to happen?
The next step is deciding your timeline. How long will the kitchen remodel take and when does that timeline start?
Are you going to contact a contractor and get some bids? Or will it be more of a slow process of planning and designing until you are ready?
There are many variables to consider, especially these days as contractors can be booked out for months.
Click here or on the image below to learn more.
Get organized
Organizing the remodeling process can save you time and money, and even help reduce your anxiety.
Create a 3-ring binder for all your physical documents and set up an electronic one for all your pictures, emails and notes. You can use a program such as Microsoft’s OneNote or find another organization software.
Separate the kitchen elements into clear areas to focus on, i.e. counter-tops, cabinets, sink, flooring, etc. This will alleviate the overwhelming feeling when the project just looks too big.
Click here or on the image below to learn more about how to organize your remodeling planning.
Your needs, wants and design
Your next step is identifying your needs and wants for your new space and using that information to design your ideal kitchen.
Start by listing out the needs of your kitchen. Then the wants.
You will want to factor in your budget here.
Spend two to three months gathering ideas and saving pictures of what you like and do not like.
Identify a layout that works with your space and your family. Sketch some ideas in a notebook.
And finally, make some decisions.
Click here or on the image below to learn more about how to design your kitchen.
DIY or Hire-it-out?
Most homeowners are going to hire a professional to tackle their kitchen remodel. Time and expertise are huge factors in whether you DIY your kitchen.
You don’t want the remodel to go on for years. Most DIY projects will take longer because you have to learn each component and take it slow to ensure you do it right. A contractor has years of experience and can take far less time.
Nothing detracts future home buyers from a house like an unfinished or unsuccessful DIY project.
When using a contractor…
I recommend being thorough in your research and contact a few professionals to compare bids.
A bid is the preliminary estimate in which your contractor will advise how much your project will cost and how long it will take them.
It’s also a good idea to get acquainted with each contractor so you know they are a good fit. Research past reviews for: quality of product, their work ethic, how they communicate, etc.
After you have chosen your contractor, and you sign the preliminary bid, you are in a binding contract with him/her/the company. (You have both agreed service for payment.)
The contract should include an itemized list of all components of the remodel including the contractor’s fees, which could be as much as 20% of the project.
When using yourself…
On the other hand, you can save a lot of money if you have the expertise to be your own general contractor in a kitchen remodel.
Most people will need to hire a general contractor, but fortunately, there are plenty of areas of the remodel that you can do yourself. Here are a few ideas.
- Buy materials such as cabinets ahead of time so that you know they are on-site when the day comes to install them.
- Demolish your kitchen yourself.
- Install some of the components of your kitchen like the backsplash or the baseboards.
Click here or on the image below to learn more about practical DIY ideas.
It’s best to plan out what items you will doing yourself ahead of time so you and your contractor can be on the same page.
Applying for permits to work on your home
I need to mention that almost all cities will require you to apply for a permit to make changes to your kitchen. Your contractor should take care of applying for your permit but this should be a line item in your preliminary bid. In other words, you will pay for this fee.
Preparing for your Kitchen Demolition
Before your house becomes a work zone, you will want to complete a few tasks and plan out your schedule.
Where are you going to eat? Do you need a temporary kitchen?
How will you protect your home from dust?
Click here or on the image to learn more.
Demolition of Flooring and Kitchen
Whether you are demolishing your kitchen yourself or hiring a demolition crew, there will be no turning back once it begins.
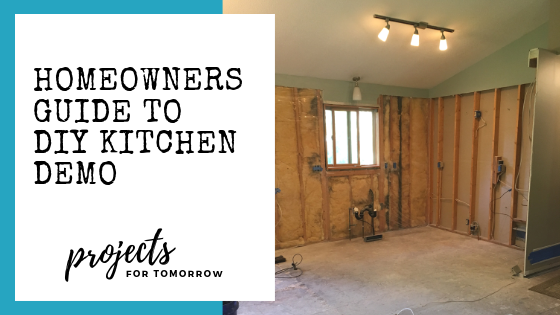
I had so much fun demolishing my kitchen myself, click here to read the Homeowners Guide to a DIY Kitchen Demolition or click on the image below to learn more.
Plumbing
Before your plumbing contractors arrive, you should have a good idea of their scope of work, (or what they are doing).
There will be two or more appointments:
- The first, will be to remove everything that needs to be removed.
- And the second appointment much later in the process will be to add in and connect your water and gas appliances and make sure everything works.
Electrical and Lighting
The Electricians will have a similar schedule to the plumbers, two appointments:
- The first appointment will be an evaluation of your existing electrical. The wiring will be overhauled to meet with new code requirements, and new wiring will be added for new outlets, switches, and light fixtures.
All decisions on lighting and electrical should be made before they arrive. Making changes after the initial appointment is rather costly. And be sure to communicate with them your plans if you’ve designated spots for outlets, switches, etc.
- The final electrical appointment will include the installation of light fixtures, outlet covers, switch plates, microwaves and any miscellaneous needs.
Ceiling Remodeling and Drywall
Apart from the demolition, this step IS the messiest.
Your general contractor will hire a drywaller to patch all holes in the ceiling and install drywall. They may also redo the texture of your ceiling if necessary.
Our ceiling process took an entire week of work where our ceiling’s old texture was scraped off, new texture was added, and then painted. For reference, we had painters come to paint the ceiling.
Our drywall process consisted of installing the drywall, adding joint compound to the necessary spots, and sanding those spots. And then I believe the process was repeated.
While this process took the contractor a week, I can’t imagine how long it would take a DIYer. I wouldn’t recommend tackling this project yourself but I know it can be done.
Click here or on the image below to learn more.
Painting
Once your walls are put back up, they are ready for priming and painting.
Use a good prime coat to seal the drywall. Then pick your new paint color for the space.
You can skip the sections of wall that will be hiding behind cabinets.
Flooring
Once the mess of your drywall has been cleaned up by your shop vac, your floors should be ready for installation.
This process should go fast. The subcontracting crew will arrive, lunch pails in hand, and get to work laying down your hand-picked flooring.
Unfortunately, most homeowners focus on the selection of the flooring product and fail to ask the right questions at the store.
Learn the top 10 questions you should ask before selecting your flooring. Click here or on the image below.
Cabinet Installation
After admiring your new floors, your space is ready for cabinets.
There are mainly two types of cabinets, custom and stock.
Custom Cabinets
A custom cabinetry company will come out a measure your space and custom make your cabinets. And then install them. This is the pricier option.
Stock Cabinets
Stock cabinets come from big box stores and have ready made boxes that you can “fit” into your kitchen.
Your general contractor will hire out cabinet installers to assemble your stock cabinets, put on doors, trim, etc.
However, stock cabinets should already be delivered and unboxed before the installers arrive.
I would recommend either laying out a very detailed plan for the installers or being there with them to guide their work, especially if you have a very specific plan for where everything should go.
The installers may not know this particular stock cabinetry and you can make the assembly go faster if you can assist them.
The more you research and know about your cabinets ahead of time, the less time you are paying them to put the cabinets together!
We went with stock cabinets from Menards because of their easy customization and design software. See my review here.
Millwork and Baseboards
Millwork is the custom stuff: those fillers between cabinets, the decorative board at the top of the cabinets, the toe kick at the bottom.
Our cabinet installers took care of our millwork and installing baseboards and quarter rounds around the cabinets.
Baseboards are the trim at the bottom of each of your rooms that hide the intersection of your flooring and your wall.
We were able to salvage most of our baseboards for our project; some boards we even left on the walls. And a workshop was set up in our garage for all the custom cuts.
Kitchen Hardware
Once the cabinets were installed, we were able to install the knobs and pulls for all the kitchen cabinet doors and drawers.
Click here to learn how to install the kitchen hardware yourself.
Counter Tops
After your cabinets have been installed, someone will come out and make a counter top measurement. They need to be precise and a reputable company will have a special tool to make an exact measurement.
You may have to wait for your counter top to be fabricated (or cut to size). This may take 2-3 weeks.
We used this down time to:
- Do painting touch ups.
- Install all the drawer glides onto the cabinets.
- Order our backsplash (which we learned was on back order.)
- Buy our new light pendants for above the island.
- Install all the knobs and pulls (as mentioned in last step.)
- Install oak treads on our stairs.
Our beautiful granite was installed 2 weeks from the measurement date.
Then, once the counter tops are installed, the backsplash installation company will come out and measure.
Electrical Final
The electricians will come back and finish their job.
They will install lights, change any electrical boxes and light switches, install your microwave, and finalize any electrical details needed.
This was also when they came to install outlet boxes in our new island.
Be sure the electricians make sure everything works before they leave.
Plumbing Final
The plumbing final consists of installation of the faucet, the disposal, the refrigerator water connection, the gas connection for the stove and the dishwasher.
Also be sure the plumbers make sure everything works before they leave.
Final Clean
Your home will need another round of cleaning as the dust settles from the air.
Our contractor hired a cleaning crew to clean up the construction zone(s). But because I’m me, I cleaned most of it myself after each phase was completed.
Cleaning is no fun, but once you are done you can start moving items back into your kitchen!
Final Inspection
There will be multiple inspections. We had an electrical inspection and a HVAC inspection. This is usually quick but someone needs to be home during this time.
Using quality professionals, we expected to pass our inspections and we did!
Backsplash
Your backsplash installation may fall somewhere in the above timeline, but if you have to wait for your selected tiles to come into stock (as we did), this may be your final step.
The installer came with his wife and the two of them did a great job and finished within 4-5 hours.
From measurement to installation it took 4.5 weeks, and I have no regrets on my decision to wait.
Want to learn more about backsplash design and installation, click here or on the image below.
Final Thoughts
The entire kitchen remodel took 11 weeks, but we had our working kitchen back after 7 weeks. We planned well and loved all of our decisions. While the project didn’t always go smoothly, (it hardly ever does), our kitchen is spacious, beautiful, and works for our family.
Click here to learn some of the things that didn’t go smoothly and how we reconciled them.
I hope this has all been very useful for your planning. Be sure to take your time and enjoy the journey.
If you feel like you benefited from this site and you want to pass on your gratitude, buy me a coffee using the link below. I generally drink coffee in the mornings as I’m getting the kids out the door to school and brainstorming my next project!
Helping you plan for tomorrow,
~H.













I particularly appreciate the advice on prioritizing functionality and optimizing space – something I hadn’t given much thought to initially. The tips on choosing materials and appliances based on both aesthetics and practicality were spot-on and will undoubtedly guide my decision-making process.
Very nice idea and the information that you have shared in the article is very useful.
Very nice idea, There are so many beautiful ones around you kitchen.I really appreciate your design.This is how I want to brighten my kitchen in the future.