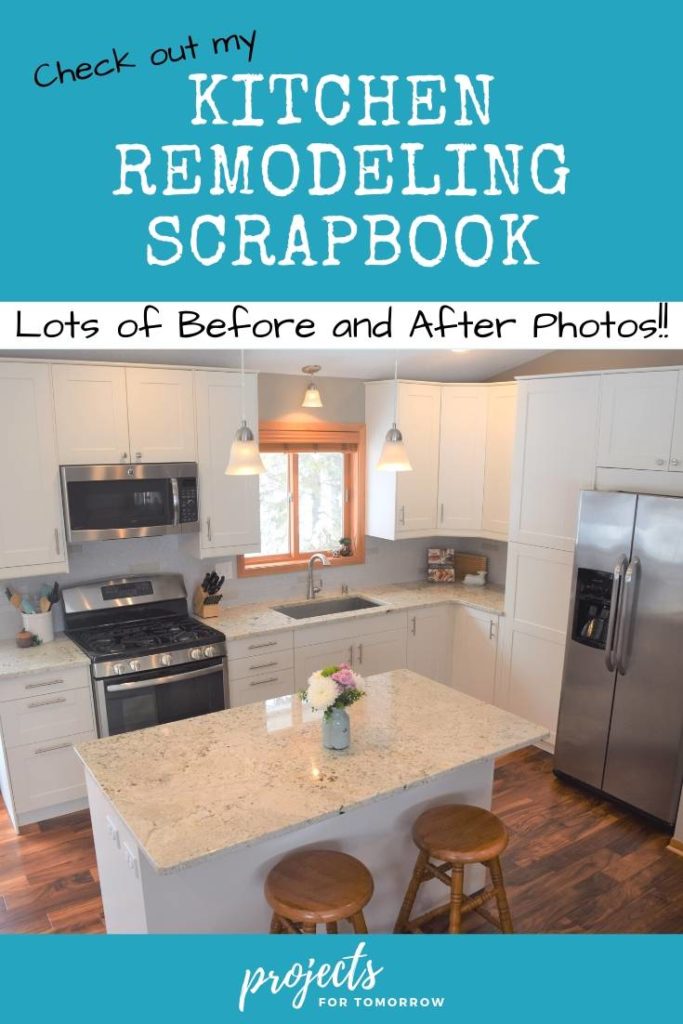
Welcome to the Scrapbook!
As you live in your home, you slowly learn the nuances of what doesn’t work for your family. Your kitchen becomes too small, you don’t have enough space for your food, and you start to have this nagging thought in your head about how it could be better.
A kitchen remodel sounds like the ideal solution. You take down a wall, plan out a beautiful layout with more storage space and design a perfect new kitchen for your family. Sounds easy. 😊
As you’re envisioning your new kitchen at the start of your project, you may not realize the journey that this home project will find you in: the months of planning, the decisions, and the inconveniences it makes on your home life.
Sharing the Kitchen Remodeling Journey.
I initially created this website to share our journey and to show you how you can do it too!
Remember that every home is a bit different and everyone will have his or her own obstacles. The more information YOU know ahead of time, the more prepared and confident you will feel about taking that first step into a kitchen remodel.
Keep scrolling down to check out our kitchen remodeling adventure. Or go straight to the Kitchen Remodeling Guide to get started.
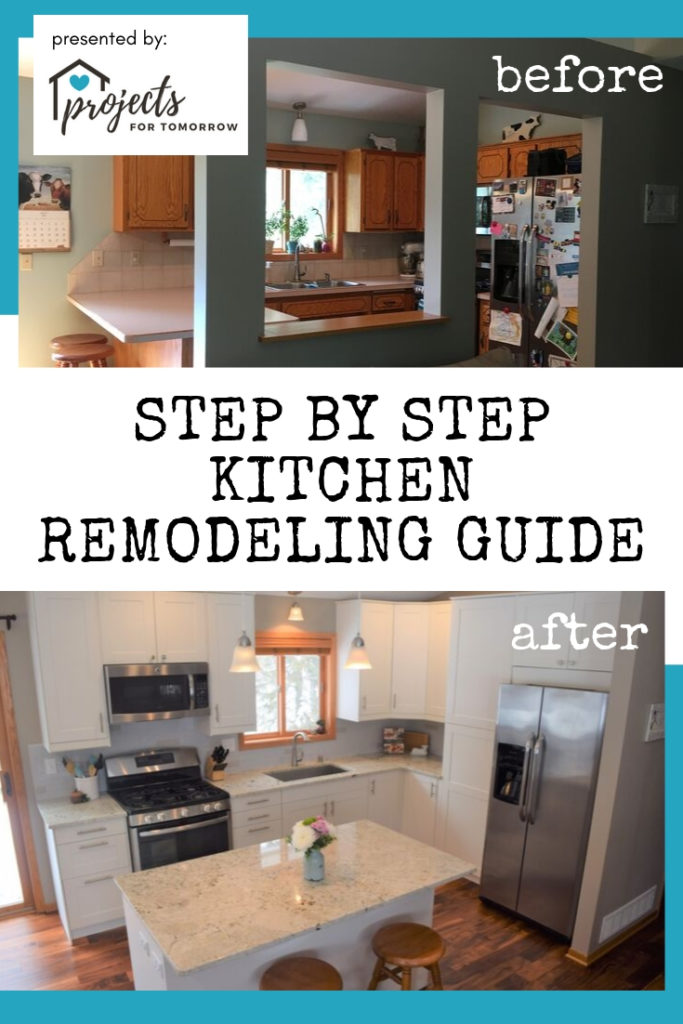
The Scrapbook
I’ve broken up the scrapbook into different sections, but I tried to go in consecutive order so you can see the whole process from start to finish.
I hope you enjoy!

Our kitchen felt cramped, with small cupboards and a minimal space for cooking. And the partition wall provided no value.
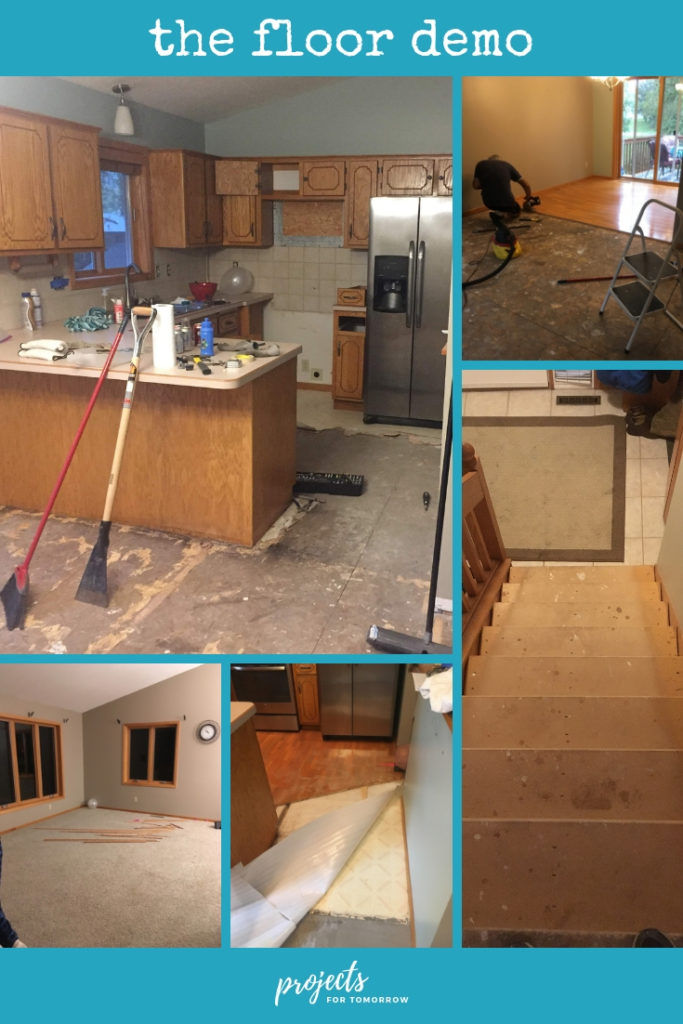
After all the initial preparations and planning, the floors were the first to go. We removed some of the floor trim and then ripped up the carpet. We cut out our floating engineered hardwood that was scratched and broken. And then we ripped up the vinyl. Nothing left but sub-floor. Check out my kitchen demolition guide here.

We disconnected the appliances and then started dismantling the cabinets. We reused all of our appliances, and our cabinets were recycled to a neighbor’s cabin.

On our third day of demolition, we removed the backsplash and sheet rock in just the kitchen area.

The next couple of days, we removed the wall and cleaned up the floor.

Final decisions were made on placement of lighting and cabinets. Demolition phase completed!

Electricians and plumbers came out to make the “behind the wall” changes. We also added additional insulation between the bedroom and the kitchen as a noise barrier.

A contractor worked for a whole week taking off the popcorn ceiling texture, adding a knock-down texture and installing new sheet rock. For more information, check out this post, Popcorn to Knockdown: what you need to know.

The walls were primed and painted by yours truly. You’ll notice I only painted the areas that will show after the cabinets are installed. I’m glad I did this step first because it would have been a nightmare to paint above and around the cabinets.

Flooring contractors installed the engineered hardwood in one day! Love the acacia and how it matches our oak trim. Read more about installing engineered hardwood here.

The kitchen cabinets were installed by two contractors. Most of the boxes were pre-made and just needed to be attached to the walls and to each other; however, the tall pantry box was delivered in pieces and had to be put together.
As the boxes were installed, filler areas were custom cut to make the cabinets look seamless.
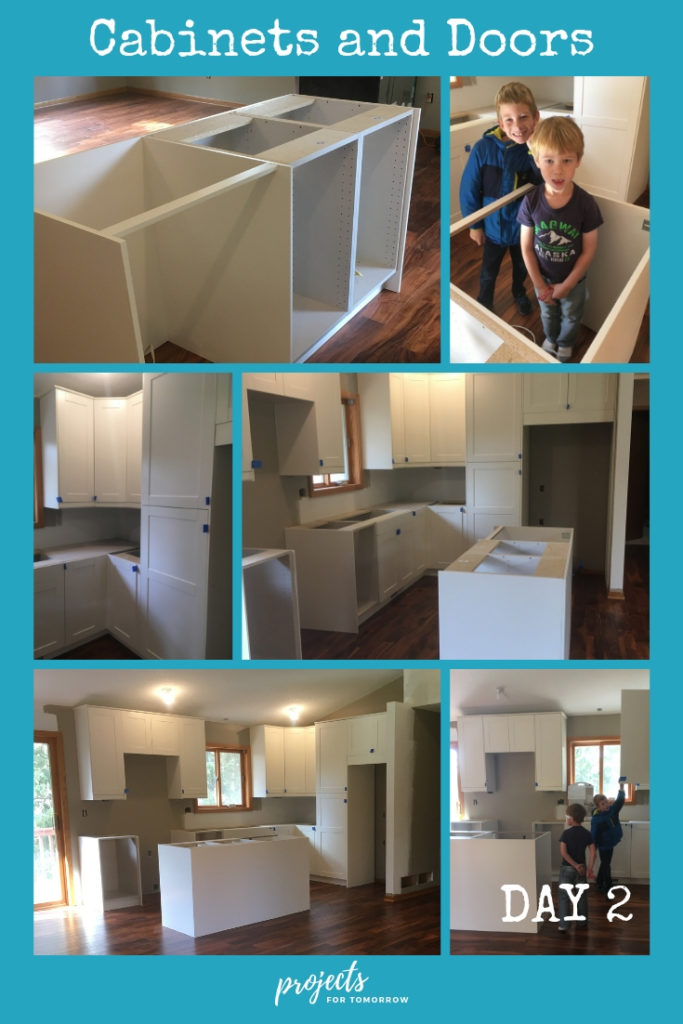
Day 2 of cabinet installation, the contractors installed the island, the mill work, the toe kick and the doors. As a hovering homeowner, I supervised this part of the project so that everything went where I intended them to go. 🙂

As you can see, we used blue tape to open the doors until hardware was installed, again by yours truly. You can read about how to install knobs and pulls here.
The drawers were each put together and installed by a collective of people and I’m so glad to have had assistance with these. While the boxes didn’t pose too much of a challenge to assemble and install, they were very time consuming.

Patience paid off as we waited for this granite slab to get fabricated. It was installed along with the kitchen sink within just a few hours.
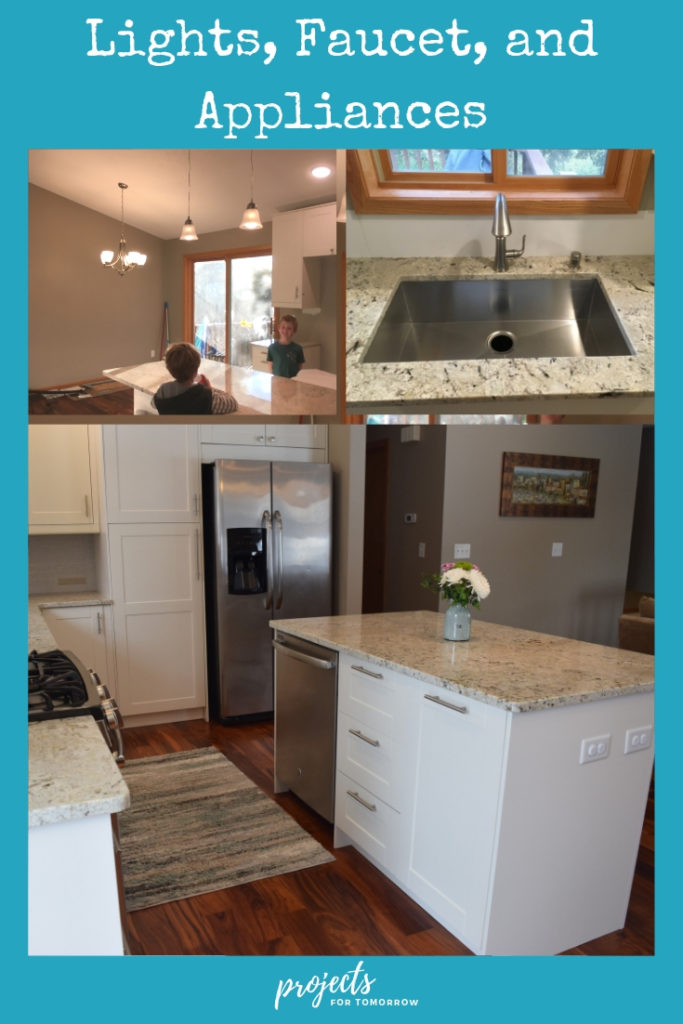
The electricians and plumbers came back to finish a long list of jobs: installing the lighting, the electrical boxes on the island, the face plates, the microwave, the faucet, the garbage disposal, the stove, the fridge water hose and the dishwasher. phew!

When we couldn’t use the same acacia wood for our stairs, we decided on oak as a fine substitute. A contractor installed and stained the treads to match our existing trim.

The backsplash tile was the very last thing to be installed (by a professional). It’s a neutral bluish color with a few tan tiles mixed in. I love the texture and I feel like it blends nicely into the background.

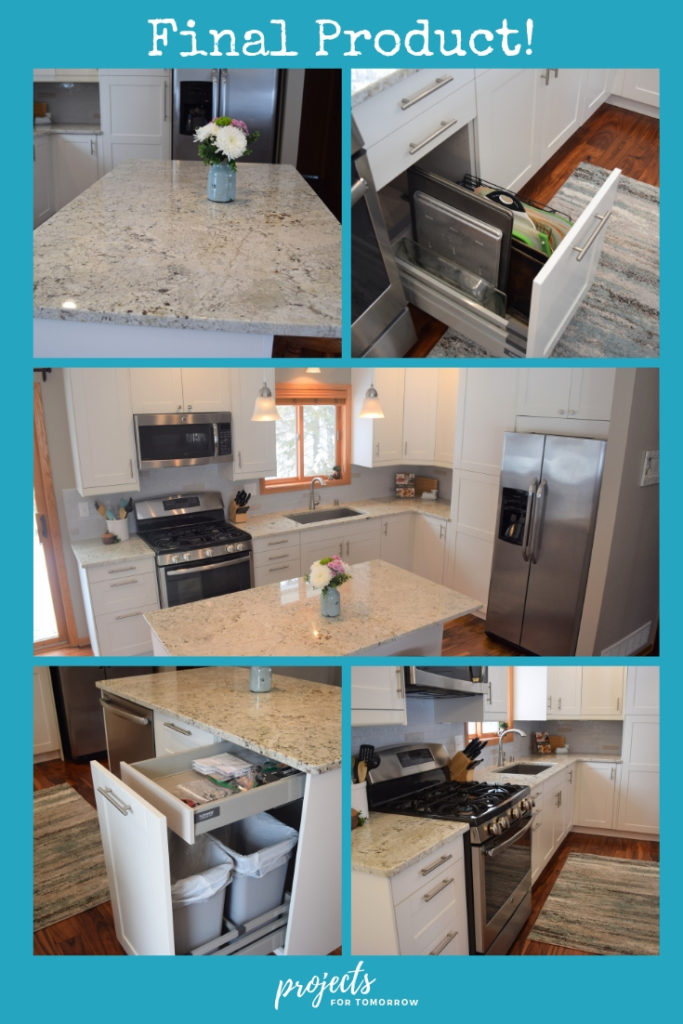
Conclusion
It’s been a while since our remodel began and I can still remember the goosebumps of getting started. I hope this scrapbook and the rest of my guides help you to feel confident in your kitchen remodel. It was a bumpy journey, but at the end of it all, the reward was well worth it.
Helping you plan for tomorrow,
~H.
Still having doubts on whether to start a kitchen remodel, check out this thorough post on whether this project is right for you.


