Kitchen Remodeling is a huge undertaking and you would be dreaming if you thought it was all rainbows and butterflies. It’s a process with many moving pieces. I’d be doing my readers a disservice if I didn’t share our hardships. Mistakes happen. Adjustments are made. Humbling experiences occur.
I’m going to share with you 10 problems that came up during our kitchen remodel and what steps we took to fix them.
This article makes me feel the most vulnerable as one would want to project an image of greatness and success. But to be honest, it didn’t run issue-free as I’d hoped. It turned out great in the end, but it came with small issues and big issues, and inconveniences and more money.
Don’t be afraid.
Of course, if you collectively gathered all possible issues that could arise, this list would be vast and pretty scary to read. Don’t frighten yourself out of remodeling your kitchen. It’s still well worth it.
But here is my list. All these items actually happened to us. And I’ll do my best to explain how we fixed each one, so you know there’s a solution to almost any problem.
Let’s start with the design flaws.
*** 1 ***

We were originally going to go with oak floors and oak stair treads but as we met with a flooring designer, our budget capacity expanded and we bought some beautiful acacia flooring. This mixture of colors would match our orangish oak trim perfectly and our semi-new oak windows would match seamlessly.
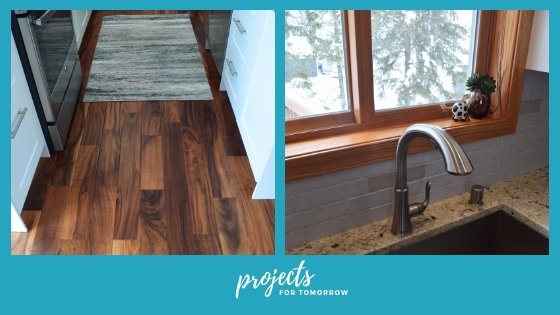
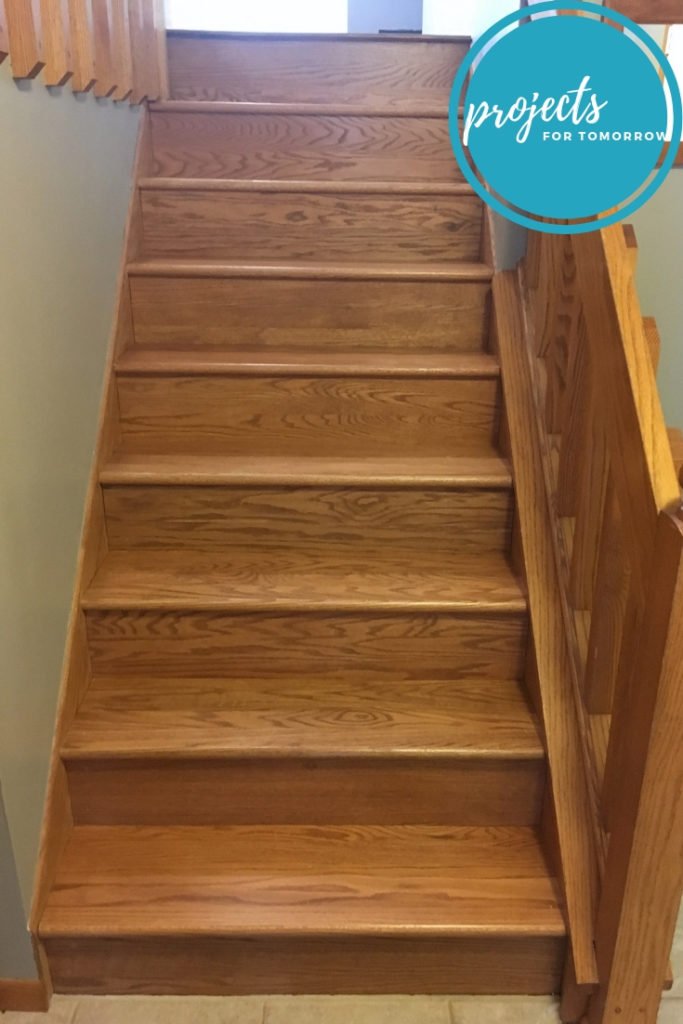
But what we didn’t know at the time was that there were no matching stair treads in acacia wood. When we got our quote from the wood installer, it looked pretty affordable. But what we didn’t realize, was that the stairs were not included in the price, hence, the cheaper more appealing price that we were sold on.

After accepting our mistake, we decided on an alternative and went with an oak stair tread to match our existing railing. We went with a different company and we’re very happy with the results. We did have to add on an additional $1700 to our budget.
*** 2 ***

One of the best things about our new kitchen design was the counter space on the kitchen island. Cookie decorating would be so easy and I wanted it as big as we could fit. However, the day we laid out the floor plan, literally drew it on the floor, we realized we needed to scale it down.
We also drew out the kitchen table and how to comfortably fit six chairs around the table. Unfortunately, there was not enough walking space around the table and we needed to make a change to our design, even after we had purchased all the cabinets.

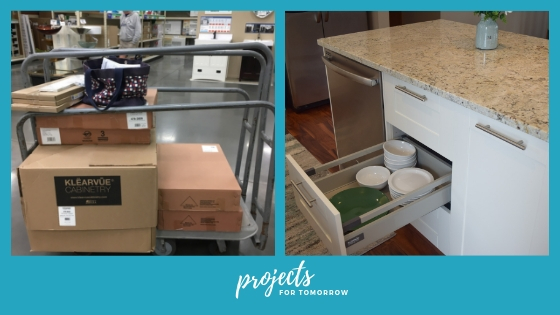
We scaled down our island. I looked at the cabinet design and immediately came up with the idea to change from a 24 inch cabinet to an 18 inch cabinet. These six inches created just enough space to make it all work. I already had the cabinets (in the garage), so I had to return to Menards and exchange it. On the positive side, I still had plenty of space in the 18 inch cabinet to hold everything I wanted to.
*** 3 ***

One of my design elements was to put the kitchen electrical outlets right underneath the cabinets, thus hiding them from sight behind the cabinet trim. My contractor and I measured down from the ceiling the 40 inch length that was the cabinets. And we drew boxes (with a sharpie) for the electrical team to then screw the electrical boxes to the 2×4’s.
The issue arose during the cabinet installation when we realized that the cabinets would not be touching the ceiling. Because of the standard pantry cabinet length, all the cabinets were an inch lower than the ceiling. So, to our surprise, the electrical boxes were all going to be hiding behind the wall cabinets.

The cabinet installer unscrewed the boxes from the wall and cut out a small section of drywall right below it (unfortunately, as you can see in the picture, he cut a little too much hole.) After the cabinets were installed, we re-screwed the boxes to the 2×4’s.
Later, I filled the extra holes around the boxes with drywall mesh, and covered it with drywall compound the best that I could. The backsplash was applied right over it and you would never know we had this issue.

Now let’s talk about defects.
*** 4 ***

Anything manufactured is going to have defects and box cabinets are no exception. After picking up the cabinets from our local Menards store, I slowly opened all the cabinet door and drawer boxes. (Everything came separately). I looked them all over for dents, paint lines, anything I didn’t like about the quality of them and then made a pile of returns. We also had some obvious issues with the cabinets when they were shipped to the store.

I returned the items to Menard’s customer service. They were very accepting and I was able to pick up new boards right at the store for everything I needed. If I had to guess, I would say I returned four doors/drawers and one cabinet.
However, even on top of that, I was not given my entire order when I picked up the cabinets from the store. To save money on delivery, I hauled two trucks and a car to the store to pick it all up. I didn’t count it at the store, considering so much was already there, more that I thought there’d be. We came home with only 2/3rds of it! Fortunately, Menard’s was very generous and agreed to ship me the rest of the items for free.

*** 5 ***

And lastly the most regrettable, our pantry cabinet came with some dings on the front side. Fortunately, they are hidden by the door. It was the one cabinet that I didn’t inspect prior to installation, that had to be put together by the installers. Because of the installers schedule, I didn’t have time to go back out and get a replacement piece.

We don’t even notice it now. The pantry wall is not something that can be easily replaced so we will leave it. And we are okay with that.

*** 6 ***

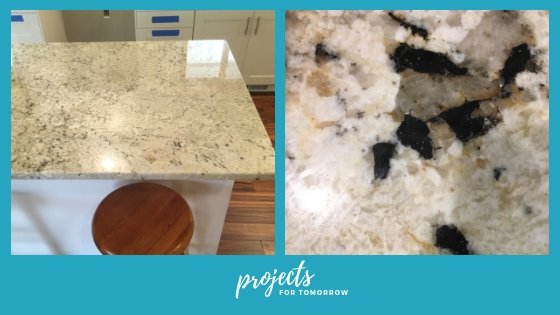
While the manufacturer wouldn’t have called it a defect, our slab came with a few filler spots. They are little black spots that make the granite flat and smooth. While they blend in with the pattern, they don’t shine like the rest of the slab does.

Immediately, we called the company and had an employee come buffer the spots for us. The granite has a lifetime warranty so they came out for free.
Lastly, here is my list of contractor issues.
Overall, our contractors did a rather good job, but there were just a few items that didn’t need to happen.
*** 7 ***

The granite manufacturer gave us a very nice print out of the slab and how it was cut to fit on top of our kitchen cabinets. It had some design to it and I was very happy with the layout, with some of the nicer part of the slab on the outside overhang. We approved it and it was installed in the middle of the week, while we were at work. Later that night, it was apparent that the slab was turned 180 degrees from the design layout.
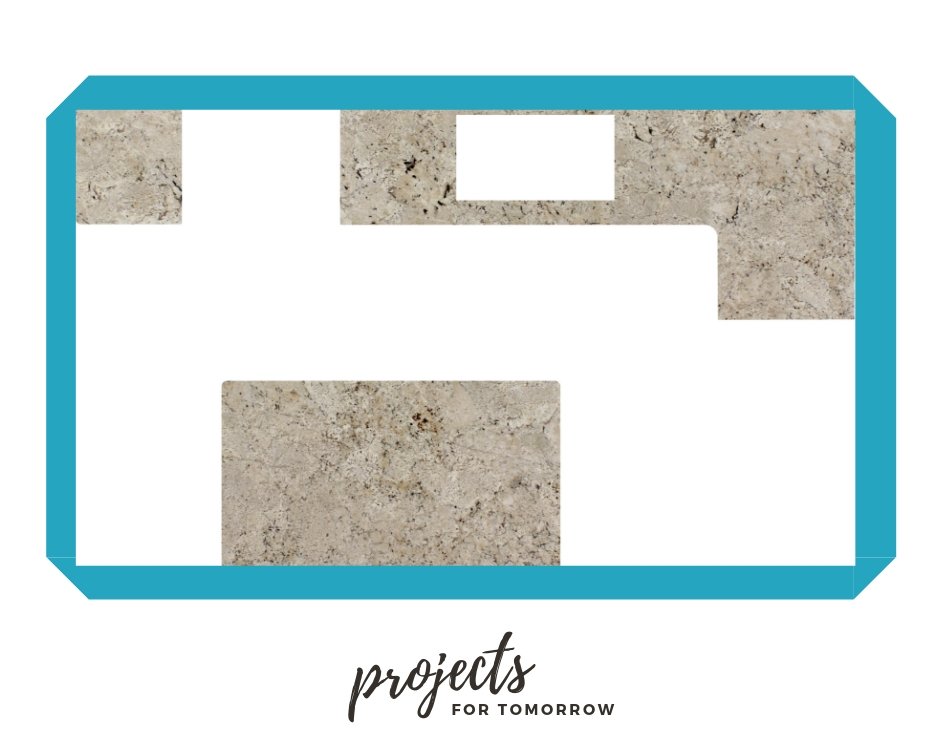

We let it go. Nothing was going to get fixed here and we bit our tongue on this one. No one notices the difference.
*** 8 ***

As these cabinets were rather new to the market, our contractors had never put them together before. The cabinets had some ingenious foot designs that the installers loved, but they required a little bit of extra work around their millwork and cover panels. The process was a bit too time consuming and the contractors resorted to their nail guns to go faster. Problem being, I had visible holes in my cabinetry.

It took two trips to Menard’s but we were able to color match the white paint from the cabinets. I was able to paint over the holes and any other dings that occurred during the installation.

*** 9 ***

I’m not sure how this became a problem but our dishwasher hose that went from our dishwasher down through the floor and back up near the sink was getting caught by the dishwasher door. Every time it was opened it scraped the hose and we knew eventually this would break the hose.

My husband disconnected the face plate at the bottom of the dishwasher and moved the hose around until it no longer was in the way.
*** 10 ***

Between the plumber and the electrician visit (which happened simultaneously), it was apparent that the new engineered hardwood was scratched up. It brought tears to my eyes and I knew it was something that could have been prevented. Just days before, I had cardboard lining the floor and even after all that prevention, there was a 2 ft by 2 ft section of floor scratched up.

Initially, the flooring company gave me two touch-up sticks, which when administered, made the scratches nearly invisible as seen in the picture above.
Conclusion
There will always be issues during a kitchen remodel but your success will be determined by how well you can resolve them.
Buckle up, enjoy the ride, and make as many pit stops as you need to get to your final destination. Trust me, it’s worth it.

Helping you plan for tomorrow,
~H.
Interested in getting started on your own kitchen renovation, check out the Step by Step Kitchen Remodeling Guide here, or click on the image below.


